自建 Bitwarden Unified w/ 黑魔法 & 修 WebAuthn
最近看到 Bitwarden 提供了新的自建镜像:Bitwarden Unified,非常感兴趣。
我是 Vaultwarden 的用户,好用那确实也挺好用的,而且能白嫖全功能它不香么?当然众所周知的是这东西没有安全审计,会比较灵;而 Bitwarden 自身毕竟要卖钱,所以相对来说比开源灵车更令人安心一点。
不过 Bitwarden 免费的版本也缺了一些比较重要的功能,比如说 Login Item 的 TOTP 验证码生成(免费版依然能保存 TOTP Token,但是生成六位数验证码是高级会员功能),比如说用户登录的 WebAuthn 2FA,等等。
之前 Bitwarden 官方服务端的自建看着就让人毫无欲望,而现在的单 Docker 让我觉得还行,于是就来试试吧。
途中还搜到了黑魔法,可以在官方服务端上解锁高级会员功能。
Requirements
- Docker Engine(& Docker Compose)
- HTTPS(证书喂进 Docker 里的 nginx 或使用 HTTP ← 反向代理 ← HTTPS 流量)
- 能用 SMTP 发邮件的用户(管理员登录和邮件地址验证)
Docker Compose
直接用官方给的 Compose Template 就行了,当然用于存储环境变量的 settings.env 也要记得配置;数据库密码不改也没问题吧。
当然,如果你想用 docker run 也是可以的,就不在这里赘述了。所有有关内容都可以在官方文档查询到。
这里只提一些注意事项:
- 目前不用 Volume 的话启动之后就会 Bad Gateway,所以涉及到几个 Volume 的部分就不要改动了。
- 现在(2023/01/11)有人提了 issue,所以从日志来看的话应该是 nginx 服务遇到权限问题了。不知道会不会修让 bind mount 也可以正常使用。
- 如果用反向代理的话(这 Docker 镜像里其实已经塞了一个 nginx 了),例如我用的 Cloudflare Tunnel,只需要映射 HTTP 端口并且在
settings.env里禁用 SSL,但是反向代理那侧一定要加上 SSL,否则会炸锅。 - 数据库可以用 sqlite,可以只指定类型,路径有默认值[1]。
- 其实在本文发出来的时候还不太行,但是本文更新时已经基本没什么问题了。建议使用
dev分支的镜像,目前 SQLite 基本 patch 好了(不过 org 相关的功能有点问题,暂不确定是不是数据库的问题)。
- 其实在本文发出来的时候还不太行,但是本文更新时已经基本没什么问题了。建议使用
如果你配置完没有遇到任何问题,那么 docker compose pull && docker compose up -d 之后,你就能在你指定的端口见到一个正常的响应。
黑魔法
然后我就开始思考,既然自建 Bitwarden 采取的是上传 license file 的方法验证,那么有没有办法动点手脚呢?稍微研究一下官方服务端的代码之后,可以发现验证 license file 其实就是验证数字签名。所以,如果能替换掉用于验证的证书,那么就有了自签 license 的操作可能。
一通 Google 之后很快找到了这个:jakeswenson/BitBetter: Modify bit warden to provide my own licensing for self hosting
再一点进 Issues 区发现了这个:It works fine with Bitwarden unified. · Issue #154
感谢互联网,又可以摸大鱼了。
修改 Compose 配置
首先把 Issue 里的 Dockerfile 存下来备用。
1 | # Build BitBetter for API |
Dockerfile 里固定了一个 commit hash,算是审计之后没有问题代码的版本。
这个时候文件目录结构大概这样子:
1 | bitwarden-unified |
然后对 docker-compose.yml 做一点修改即可。
1 | - image: ${REGISTRY:-bitwarden}/self-host:${TAG:-beta} |
生成证书
不过,在 docker compose up 之前,还需要生成一下证书。
新建一个 certs 文件夹,在里面跑一下 BitBetter 的 README 里的几条 openssl 命令即可。
1 | openssl req -x509 -newkey rsa:4096 -keyout key.pem -out cert.cert -days 36500 -outform DER -passout pass:test |
第一条运行的时候会让填些信息,随意填写即可。
生成好之后目录结构大概长这样:
1 | bitwarden-unified |
跑起来
生成好证书之后就可以开跑了。
首先确保没有正在运行的实例,有的话 docker compose down 关一下。
然后就可以老三样啦。
1 | # docker compose down |
签 license
先看看容器名称
1 | docker ps |
然后 sh 进去
1 | docker exec -it bitwarden-unified-bitwarden-1 sh |
按照 Dockerfile 注释里的说明
1 | dotnet /licensegen/licenseGen.dll --core /app/Api/Core.dll --cert /certs/cert.pfx interactive |
填写一下信息即可。注意用户 GUID 或服务器安装 ID 可能需要从 Admin Portal 获取,而登录的前提是 SMTP 工作正常,所以在这之前要确保邮件功能是 OK 的。
当然麻烦一点的话,从数据库里提应该也不是不可能就是了。
生成的 license 会以文本显示,复制保存为 json 上传就好啦。
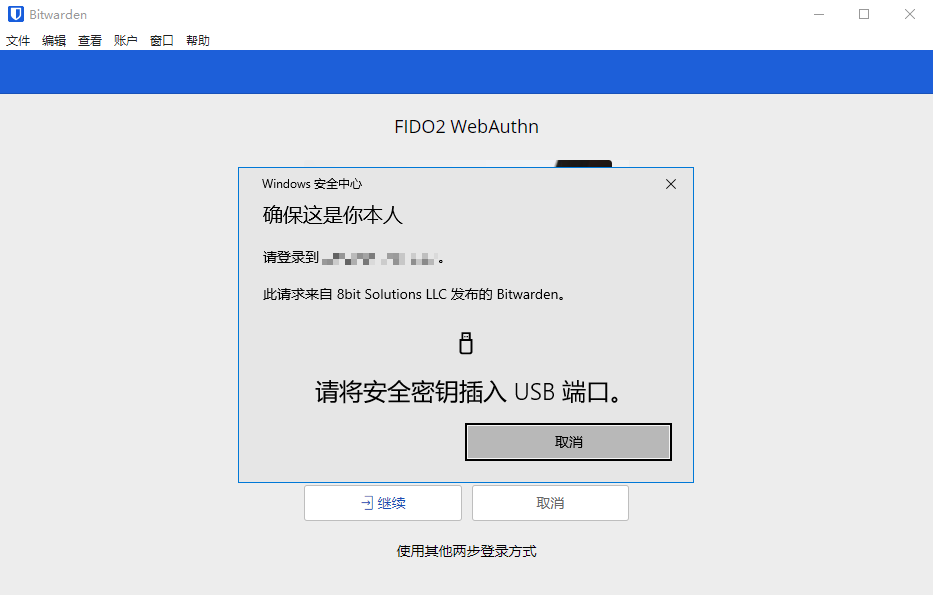
修 WebAuthn
然后是老大难问题:客户端的 WebAuthn 不工作。Vaultwarden 之前会有这问题算是我预料之中,官方的也有就有点 unexpected 了。
首先来回味一下 Vaultwarden 那边是怎么挂的:Windows 10 Desktop App and WebAuthn not working (mobile, browser extensions work fine)
然后在 Windows 客户端实际测试一下,打开 Dev Tools。可以发现 Vaultwarden 的死因是 Content-Security-Policy 头,而 Bitwarden Unified 的死因变成了 X-Frame-Options 头。
Vaultwarden 的贡献者建议修改 ALLOWED_IFRAME_ANCESTORS 配置,添加 file://(客户端的网页地址),这控制的显然就是 CSP 头了。
但是我在读了一下源代码之后,发现™这里[2]又恰好在 *-connector.html 页面把 CSP 头给排除了…… 所以这改了到底有没有用啊(恼
后来发现,是我的 nginx 配置中包含了过于安全的自动添加安全相关 headers 内容。对不起 Vaultwarden,我错怪你了!理论上在请求 Vaultwarden 的 *-connector.html 路径时,上述两个 headers 应该都不会被自动附加,所以应当参考 Vaultwarden Wiki 中提供的配置进行配置,里面还包含了用于推送更新的 WebSocket 相关配置。
而 Bitwarden Unified 和完整版官方服务端表现不一致的原因也找到了,Unified 的 nginx 配置模板[3]和完整版的 nginx 配置模板[4]存在一定的差异。在完整版的 nginx 配置中包含了这样一段,也许就处理掉了 Content-Security-Policy 和 X-Frame-Options 这两个响应头。
1 | location = /duo-connector.html { |
Captcha 的部分好像和我关系不大,所以我略过了;其他的部分,我修改了一下移植到了 Unified 的 nginx 配置中。
1 | location = /app-id.json { |
那么我修的方式也比较灵车:docker exec -u root ... 进去,然后直接在里面修改 /etc/nginx/http.d/bitwarden.conf。
经过这么一番折腾,(Windows)客户端上的 WebAuthn 也能正常工作了。不过我在测试的时候也发现一个离奇的事情:Android 上的 WebAuthn 好像炸了,不知道是 Android 或者 MIUI 或者 Google 谁的问题,非常奇妙。
导入和导出
即使同是 Bitwarden-compatible,导出密码库的时候还是会丢失一些东西,比如回收站和密码历史记录。看起来,这似乎是 Bitwarden 官方的设计;而我觉得这不太好。
所以如果你对这些东西比较在乎的话,最好在一个 instance 里一直用下去,不要轻易跑路。(
理论上来说通过迁移数据库也存在完整转移账号的可能,不过我不太想再去读 Vaultwarden 和 Bitwarden 的数据库结构差异了,跑(
总结
最后来点不负责任的特性对比吧,XD
| 特性 | Bitwarden 官服 | 自建 Unified + 黑魔法 | 自建 Vaultwarden |
|---|---|---|---|
| 代码审计 | 有 | 只需审计黑魔法 | 无 |
| 云存储 | 按需加钱 | 取决于你的硬盘大小 | 取决于你的硬盘大小 |
| 付费功能 | 氪金 | FREE | FREE |
| 功能更新 | 最新 | Almost™ 最新[5] | 部分特性未实现[6] |
| HIBP[7] | FREE (?) | 需要氪金购入 API Key | 需要氪金购入 API Key |
| SLA | 比自建高 | 取决于你的运维水平 | 取决于你的运维水平 |
https://github.com/bitwarden/server/blob/aa1f443530fd2b2fcd9bc236eb813fd4006bbc97/docker-unified/Dockerfile#L188 ↩︎
https://github.com/dani-garcia/vaultwarden/blob/10dadfca068ed449fcd4a74b70ae2cd83990d3d4/src/util.rs#L44 ↩︎
https://github.com/bitwarden/server/blob/aa1f443530fd2b2fcd9bc236eb813fd4006bbc97/docker-unified/hbs/nginx-config.hbs ↩︎
https://github.com/bitwarden/server/blob/aa1f443530fd2b2fcd9bc236eb813fd4006bbc97/util/Setup/Templates/NginxConfig.hbs ↩︎
devDocker 镜像就是bitwarden/server的 latest commit,一般会在提交一段时间后由 CI 编译并推送 ↩︎
自建 Bitwarden Unified w/ 黑魔法 & 修 WebAuthn
https://xyx.moe/021-Self-host-Bitwarden-Unified-with-blackmagic-and-fix-WebAuthn.html